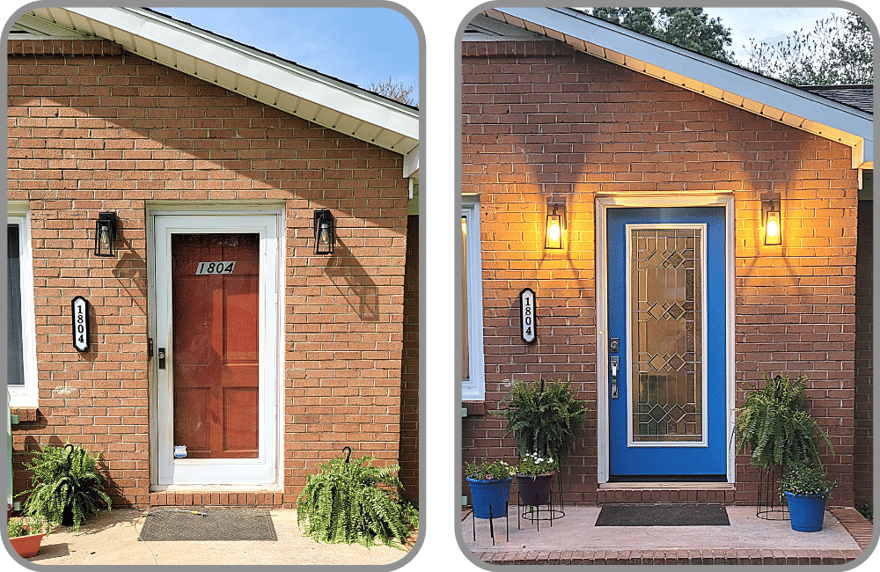
Whether it's light around your door, large gaps, old wood sills, or warping doors, BetterDoor has better door solutions to help solve these issues. In this blog post, follow along as we tackle a 1968 front door and update it with all new components. Follow along to find out how we went from this problem door to a better door with the help of products available on betterdoor.com.
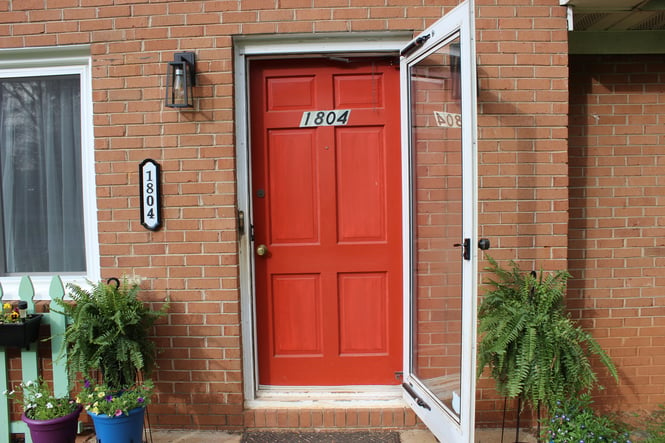
Spot the Problems
![]()
Here we can see light coming through the door. This indicates that your door is out of alignment or plumb and can be fixed with an adjustment of the loose hinges.
![]()
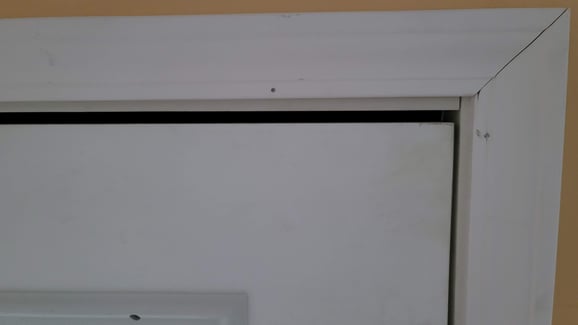
There is also light coming through where the door's bottom corner reaches the bottom of the side jamb. This is another place where light can peak through when the door is out of square. Door corner pads would be a quick fix if that was the only issue seen on this door.
![]()
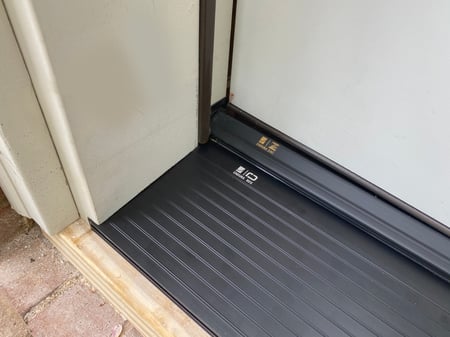
This original 1968 all wood sill is showcasing a bit of wear, tear and wood rot. Wood exterior door sills require a lot of upkeep to ensure that the material is sealed and protected against the outside elements.
![]()
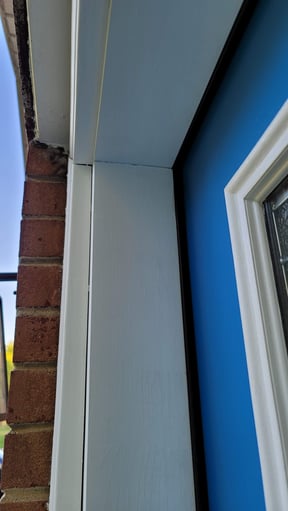
Here we can see a gap in between the frame and the door panel. This occurs when the hinge screws on the door are loose. Luckily, this can be remedied with a quick tighten of those screws. Once repaired, we recommend adding weather-sealing products, such as weatherstrip and corner pads, around the door panel to provide a good seal.
Here Comes the Solution
By adjusting the alignment of the door unit and utilizing weatherstrip to improve the overall seal, we've ensured that you can no longer see light entering the home via the top or sides of the door unit.
Damage on the sill deck is a thing of the past with the help of Endura's Replaceable Deck Sill (RDS). With RDS installed, replacing the most trafficked area of the threshold is as easy as 1-2-3! There is no better product to pair with RDS than Endura's Composite Z-Articulating Cap. The Z-AC cap provides a streamlined synthetic cap surface to seal against the bottom of the door, improving the performance of the overall door system. The great thing about this cap is that it automatically adjusts to the conditions of your door unit so that you do not have to do any manual adjustments.
 Utilizing the FrameSaver® Exterior Door Frame Kit with FrameSaver Bottoms help provide your door frame with lasting protection and durability. The FrameSaver technology combines the performance of composite meterials and the durability of wood to create the best of both worlds in this frame system.
Helpful Hints from Humble Installers
Each door installation or removal presents its own challenges and triumphs. Throughout the process we each learned different tips and tricks that we would like to share.
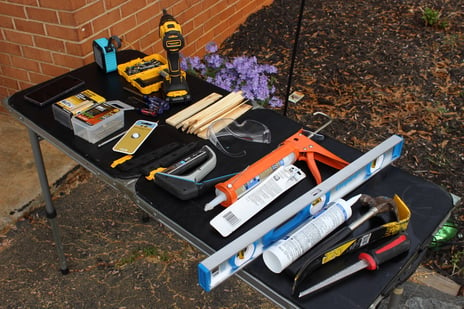
1. First and foremost, be sure to open all products and ensure the correct materials are all present and ready for the install.
2. We also recommend taking a look at the tools you have on hand to ensure nothing is missing.
3. Homeowners often dread doing their own hinge preparation, and during our installation, it was easy to see why that is often the case. We found that hinge prep time is cut in half by a sawzall with the ability to level out the area to the depth needed, as shown below.
4. Speaking of hinge prep, do not forget to prep for your strikes. Strike and hinge prep are two portions of the process that seem to be unforgettable...until they are not. Strike preparation is very important to have finished before the door is placed into the rough opening.
5. Remove any remaining caulk from the first door installation to ensure better conditions for sealing the new unit.
6. When stapling the end gaskets in place, ensure that your staples are long enough to go through the material and still make contact. We learned the hard way that we used the wrong size and were forced to adjust and staple them on more than once.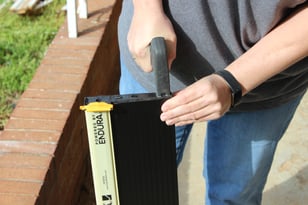
We have covered many common issues found on this 1968 door; from top to bottom, we found (and fixed!): daylight revealing sealing and alignment issues, the door being out of square, and a rotted wood sill. With the help of BetterDoor resources and components we were able to create a better door that'll last for years to come.
Which door problems looks familiar to you? We challenge you to make a list of problem areas of your exterior door(s). If you found this article helpful, please share it with a friend. Next week we will be covering how to reduce heat on exterior doors.
For more information on products and other exterior door component resources please visit BetterDoor.com.