All about Sill Caps:
We are back with another #FixItFriday! On this series we are talking all about sill caps and how to size them to fit perfectly into your entryway. Sill caps provide a tight seal between the base of the door bottom and the surface of the sill cap.
Where is the Sill Cap located?
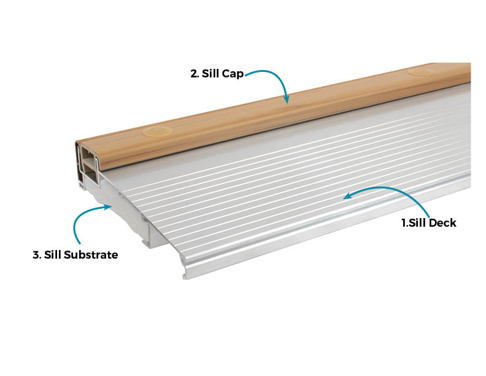
The sill cap is a part of your door threshold and is positioned at the base of the door panel, sealing against the door sweep. Due to the sill cap being located at the highest point of the sill deck, it can be a highly trafficked area, making wear and tear more likely. Luckily cutting down your sill cap is made easy with our installation instructions.
How to cut down your Sill Cap:
If you find that the sill cap you have purchased is too large, we have just the solution for a Door It Yourselfer: unlimited cut-down! With each of our sill cap products we provide installation instructions that make the process as straight forward as possible.
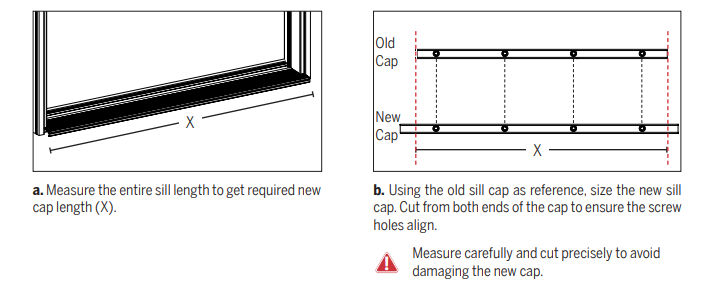
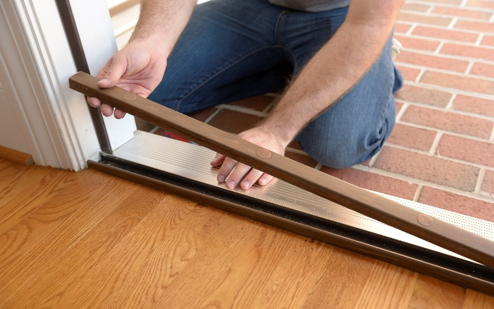
To cut down your new sill cap, measure the entire sill length to get the required new cap length or utilize the old sill cap as a size reference guide. Be sure to measure carefully and use a tool that cuts precisely to avoid damaging your new cap. We recommend using a chop saw with a fine tooth blade for the most accurate results.
For our Oak Anchored Sill Caps, align one end of the new sill cap with the jamb face. Partially tighten each screw, working from one end to the other - then, fully tighten all screws until the sill cap is seated in the sill channel.
NOTE: The door should open and close with minimal effort with the door bottom sweeping the sill cap. If necessary, adjust the cap height by removing all cap plugs and using a screwdriver to loosen or tighten the screws. Ensure proper and even door bottom seal compression - from 7/16" to 15/32".
If you need any assistance finding the perfect fit for your door let us help!
Visit betterdoor.com for all of your exterior door component needs!